
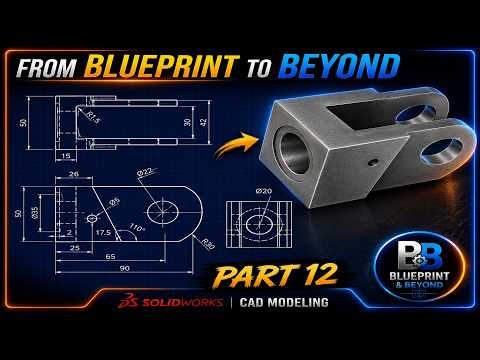
Transitioning from traditional engineering blueprints to modern parametric 3D modeling is one of the most vital skills for engineers, product designers, and CAD enthusiasts. If you are starting your Computer-Aided Design (CAD) journey, learning how to accurately interpret a 2D drawing and transform it into a functional 3D SolidWorks model is an essential milestone.
In this beginner-friendly guide, we explore the step-by-step process of taking flat geometric schematics and building fully realized three-dimensional components.
Why Master the Transition from Blueprint to 3D?
Before jumping directly into complex 3D features, every successful CAD project begins with a strong visual foundation. Reading a technical 2D drawing—complete with dimensions, tolerances, and orthographic views—allows you to plan your modeling feature tree effectively. Understanding how front, top, and side views correspond to 3D space drastically reduces modeling errors and speeds up your design workflow.
Key Steps to Convert a Blueprint into a 3D Part
- Analyze the Technical Schematic: Carefully review all provided dimensions and annotations. Identify the primary base feature as well as secondary operations like holes, cuts, and fillets.
- Select the Right Sketch Plane: Choose the plane (Front, Top, or Right) in SolidWorks that best aligns with the main profile of your design.
- Draft the Base Profile: Replicate the core geometry using fundamental sketching tools such as lines, arcs, and circles.
- Apply Smart Dimensions and Relations: Ensure your sketch is fully defined by adding exact measurements and geometric constraints (such as horizontal, vertical, tangent, or concentric relations).
- Apply 3D Features: Use tools like Extruded Boss/Base or Revolved Boss/Base to give your sketch depth and turn it into a solid body.
- Add Finishing Details: Incorporate secondary features like extruded cuts, chamfers, and fillets to match the exact specifications of the original design.
Essential Tips for Beginners
- Keep Sketches Simple: Avoid overcomplicating a single sketch. It is always better to build your model using multiple simple features rather than one complex drawing.
- Maintain Fully Defined Sketches: Always aim for fully defined sketches (indicated by black lines in SolidWorks) to prevent unintentional changes later in your workflow.
- Practice Regularly: The faster you practice translating real-world engineering blueprints into 3D parts, the more intuitive the process becomes.
With patience and structured practice, you will soon be able to take any complex 2D drawing and bring it to life in SolidWorks with absolute precision. Start practicing today and elevate your CAD skills to the next level!


