
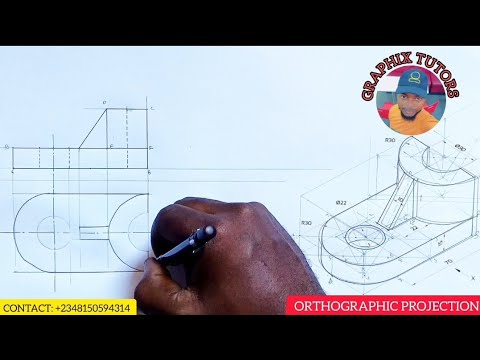
In engineering, architecture, and manufacturing, turning a complex three-dimensional object into a precise visual visual is a critical skill. This fundamental technique is known as orthographic projection, a cornerstone of technical illustration. Learning how to accurately create a 2D drawing from a 3D object allows designers and engineers to communicate exact dimensions and structural details clearly to manufacturers.
What is Orthographic Projection?
Orthographic projection is a standardized method of representing a 3D object using multiple two-dimensional views. Instead of displaying the object in realistic perspective, orthographic views render it as if you are looking directly at each face from a 90-degree angle.
Typically, a complete technical representation includes three primary views: * Front View: The main view displaying the object's most defining features, along with its height and width. * Top View (Plan View): Aligned directly with the front view to show width and depth. * Side View (Profile View): Positioned adjacent to the front view to capture height and depth.
Why Orthographic Views Are Essential
While 3D models are excellent for visual concepts, perspective angles can distort true measurements. A professional 2D drawing produced through orthographic projection eliminates perspective distortion entirely. This ensures that every line, circle, and angle reflects the exact physical dimensions required for manufacturing. Fabricators rely heavily on these precise schematics to build parts correctly, minimize material waste, and prevent costly production mistakes.
Basic Steps to Convert 3D Objects into Flat Views
If you are just getting started with technical drafting, follow these core steps to convert any 3D object:
- Select the Primary View: Choose the face that contains the most detail or the longest dimension as your Front View.
- Project Reference Lines: Draw light alignment lines extending horizontally and vertically from the front view to position your top and side views accurately.
- Include Hidden Lines: Use dashed lines to indicate internal features or edges that are hidden from direct sight in a given view.
- Apply Standard Dimensions: Add precise measurements and tolerances to finalize your technical 2D drawing.
Final Thoughts
Mastering orthographic projection is an indispensable skill for anyone entering drafting, CAD modeling, or mechanical design. By learning how to systematically project 3D shapes into clear, multi-view diagrams, you lay the groundwork for building professional engineering blueprints.


