
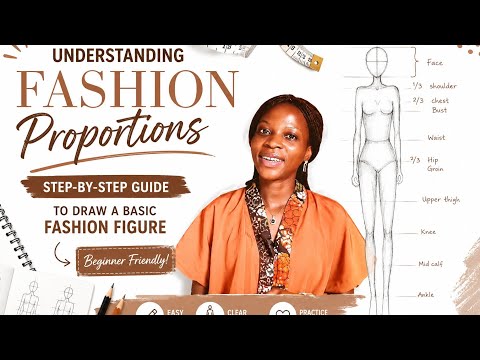
Have you ever looked at a stunning designer gown and wished you could sketch it perfectly onto a page? The foundation of every great designer's portfolio starts with a solid grasp of fashion Illustration. Before you can add intricate textures and vibrant colors, you need to master the human form—specifically, the elongated fashion figure known as the "croquis."
The Secret of the 9-Head Method
In the world of professional design, we don’t typically draw figures with realistic human proportions. Instead, we use an artistic standard known as the "9-head method." While a real person is usually about 7 to 7.5 heads tall, a fashion figure is stretched to 9 or even 10 heads. This technique elongates the limbs and torso to make the clothing look more elegant, dramatic, and graceful. By mastering this specific style of Illustration, you provide yourself with the perfect canvas to showcase complex drapes and silhouettes.
A Step-by-Step Guide to Your First Croquis
Starting your first fashion figure might feel intimidating, but it is much easier when you break the body down into simple segments. Follow these basic steps to get started:
- The Vertical Axis: Start by drawing a straight vertical line down the center of your paper. This is your "balance line" that ensures your figure doesn't look like it's falling over.
- Measuring the Heads: Divide that line into nine equal sections. Use a ruler at first to ensure accuracy.
- Mapping the Torso: The head occupies the first section. The shoulders usually sit at the 1.5-head mark, the waist at the 3-head mark, and the hips at the 4-head mark.
- Drawing the Legs: This is where the fashion magic happens. The legs in these drawings are significantly longer than in real life, usually extending from the 4-head mark all the way to the bottom of the page.
Refining Your Style
Once you have your basic skeletal structure (the "wireframe"), it’s time to add "flesh" to the bones. Use soft, curved lines to define the neck, shoulders, waistline, and calves. Don't worry about perfection on your first try; the primary goal of fashion Illustration is to communicate a mood and a movement, not just a technical measurement.
The more you practice these proportions, the more natural your sketches will become. Grab your pencil, find your balance line, and start bringing your fashion visions to life!


